Scope of application and installation conditions
1.1kV
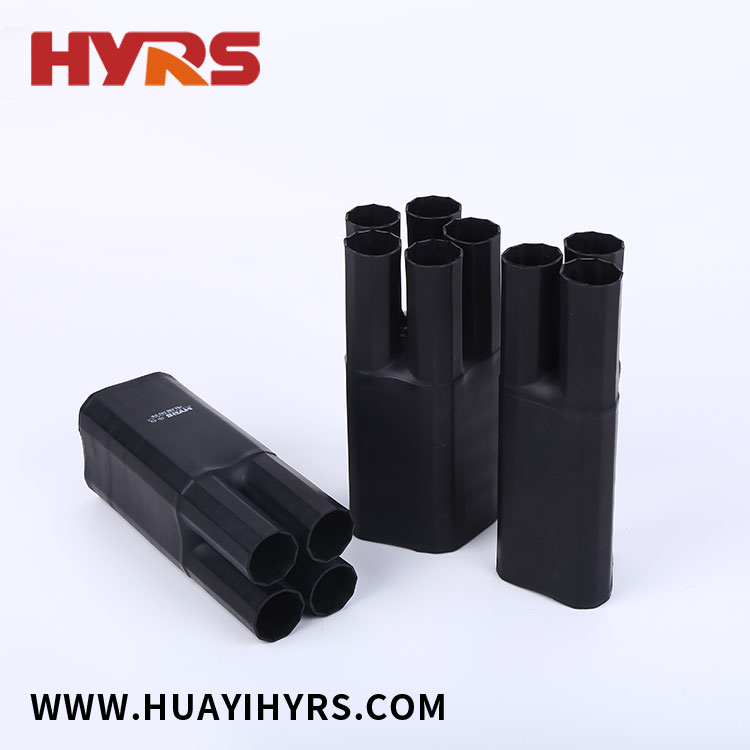
heat shrinkable cable accessories products suitable for 2,3,4 and 5 cores 10-500mm2 rubber and plastic insulated power cables.
2.The installation environment should be dust-free, with a temperature above 0℃ and a relative humidity of 75% or less.
3.Installation acceptance test standards and operation supervision shall be carried out in accordance with relevant regulations.
1kV heat shrinkable termination installation steps
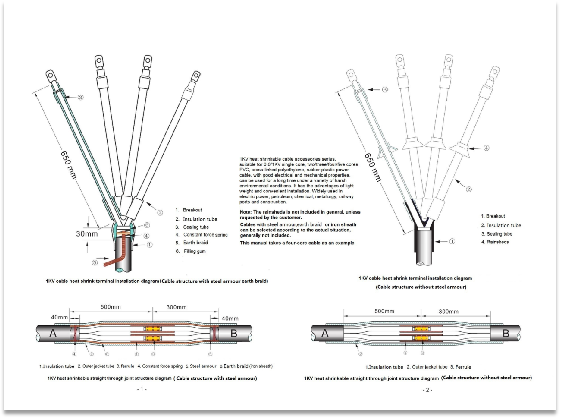
1.Strip the 650mm cable outer sheath layer as shown in the figure, if the cable is with steel armour and earth braid needs to be installed, remove the 680mm cable outer sheath layer, retain the 30mm steel shovel, and tie the ground wire to the steel armour with forcing spring firmly.
2.Straighten and separate the core wire, and insert the breakout to the root as mach as possible, then heat it from the middle to the ends to make it fully shrink.
3.Measure the length (lug hole length +5mm) from the core end, strip the core insulation, then crimp the lug, use filing to trim the surface burrs and protruding comers and wipe them clean.
4.Clean the core insulation surface, and insert the insulation tube according to the color, so that the lower end overlaps the root of the heat shrink breakout and then heats from bottom to top until the insulation tube is completely contracted.
5.Lay the marking tube on the lug and the insulation tube, heat to shrink.
6.Put the rain sheds in the middle of the insulation tube and heat shrink. (Unless required by the client, generally rain sheds does not included.)
1kV heat shrinkable straight through joint installation steps
1.Overlap the two cables A and B. make a mark in the center of the overlapping part and out off at the mark, Peel 500mm and 300mm of the outer jacket layer as shown in the picture.
2.If the cable is steel armoured structure, should keep 40mm steel armour layer and inner cushion layer, then remove the rest and a core insulation at the end of the cable as shown in the figure, and tie the steel armour with copper wires.
3.Measure a length (half ferrule length +5mm) and cut the core insulation.
4.Inset the insulation tube on the core of the cable A end, and insert the outer jacket out the cable A or B.
5.Straighten the cores of cables A and B, insert them into the ferrules and then crimp them. Use a filing or sandpaper to smooth the edges and burrs on the surface of the ferrules.
6.Clean the core and ferrules of the cable, straighten the cable, pull the insulation tube to the middle, cover the ferrule and heat the insulation tube from the middle to the ends until it is fully shrinked.
7.(Ignore this step if the cable structure without steel armour) Tighten the two ends of the earth braid (or the iron sheath) and solder them to the armour of the cables A and B.
8.Straighten the cable and tie the core together A waterproof gum is wrapped around each of the outer sheaths of the cables A and B.
9.Pull the outer jacket tube to the middle and heat it from the middle to the ends until the shrinkage is completed.

 English
  Español
  Português
  русский
  Français
  日本語
日本語  Deutsch
  tiếng Việt
  Italiano
  Nederlands
  ภาษาไทย
  Polski
  한국어
한국어  Svenska
  magyar
  Malay
Malay  বাংলা ভাষার
  Dansk
Dansk  Suomi
Suomi  हिन्दी
  Pilipino
  Türkçe
  Gaeilge
  العربية
  Indonesia
  Norsk
Norsk  تمل
تمل  český
český  ελληνικά
  український
  Javanese
  فارسی
فارسی  தமிழ்
தமிழ்  తెలుగు
  नेपाली
  Burmese
  български
  ລາວ
ລາວ  Latine
  Қазақша
  Euskal
  Azərbaycan
  Slovenský jazyk
  Македонски
  Lietuvos
  Eesti Keel
  Română
  Slovenski
  मराठी
मराठी  Srpski језик